
Hoover Repair Manual: A Comprehensive Guide
Hoover appliance repair is simplified with readily available user instructions, owner’s manuals, and service manuals downloadable in PDF format. Accessing these resources, often requiring Adobe Acrobat Reader, empowers both novice and experienced users to tackle repairs effectively.
These manuals provide detailed guidance, ensuring successful troubleshooting and maintenance of your Hoover products, from vacuum cleaners to washing machines and dryers.
Understanding Hoover Repair Manuals
Hoover repair manuals are essential resources, offering detailed schematics, parts lists, and step-by-step instructions for diagnosing and resolving issues with Hoover appliances. These manuals aren’t simply user guides; they are technical documents intended for those comfortable with appliance repair, or qualified technicians.
Typically available as downloadable PDF files, these manuals often require Adobe Acrobat Reader for viewing. They cover a wide range of models, though specific availability varies. Understanding the manual’s structure is key – sections usually include safety precautions, troubleshooting guides, exploded diagrams for parts identification, and detailed repair procedures.
The level of detail provided allows for a comprehensive understanding of the appliance’s inner workings. Manuals often include error code explanations, aiding in quick diagnosis; Accessing the correct manual, specific to your Hoover model number, is crucial for accurate repair information. Utilizing these resources can save on costly service calls and extend the life of your appliance.
Where to Download Hoover Repair Manuals
Hoover user manuals, owner’s guides, and repair information in PDF format are readily available online through various sources. Many websites specialize in appliance manuals, offering a searchable database by model number or product code. Direct access can often be found on the official Hoover website, though navigation can sometimes be challenging.
Several third-party platforms compile manuals from various manufacturers, including Hoover. These sites often provide a more user-friendly search experience. Remember to verify the manual’s compatibility with your specific appliance model before beginning any repairs. Downloading requires Adobe Acrobat Reader, a free software readily available online.
Furthermore, some online forums dedicated to appliance repair may host links to manuals or offer assistance in locating them. Always exercise caution when downloading files from unfamiliar sources to protect your device from potential malware. Prioritize official Hoover resources or reputable manual databases for reliable information.

Types of Hoover Models & Manual Availability
Hoover manufactures a diverse range of appliances, including vacuum cleaners (upright, canister, cordless), washing machines, and dryers. Manual availability varies depending on the model’s age and popularity. Newer models generally have readily accessible digital manuals online, while older models may require more searching.
Specific series, like the Hoover D813, often have dedicated service manuals geared towards electronics experts, offering in-depth repair schematics. However, basic owner’s manuals are typically available for most models, covering operation and routine maintenance. Finding manuals for discontinued models can be challenging, potentially requiring searches through archived websites or specialized appliance repair forums.
The depth of information within a manual also differs. Some provide detailed troubleshooting guides, while others focus primarily on operating instructions. Always confirm the manual corresponds to your exact model number to ensure accurate repair information. Utilizing the product code alongside the model number will refine your search results.

Common Hoover Problems & Troubleshooting
Hoover appliances can experience issues like power failures, suction loss, or mechanical malfunctions. Repair manuals offer troubleshooting steps to diagnose and resolve these common problems efficiently.
Hoover Vacuum Cleaner Won’t Turn On
Diagnosing a non-starting Hoover vacuum requires a systematic approach, guided by your repair manual. First, verify the power supply: ensure the outlet is functioning correctly by testing with another device. Check the vacuum’s power cord for any visible damage – cuts, fraying, or loose connections. If the cord is damaged, it must be replaced.
Next, inspect the circuit breaker or fuse box; a tripped breaker or blown fuse can prevent power from reaching the vacuum. Consult your manual for the vacuum’s specific fuse location and amperage.
If the power supply is confirmed, the issue may lie within the vacuum’s internal components. The repair manual will detail how to access and test the motor, brushes, and wiring. A faulty motor or damaged wiring could be the culprit. Always disconnect the vacuum from the power source before attempting any internal repairs. Remember to refer to the exploded diagrams in the manual for proper component identification and reassembly.
Finally, some models have thermal cut-offs that activate if the motor overheats; allow the vacuum to cool before attempting to restart it.
Loss of Suction in Hoover Vacuum
Reduced suction in your Hoover vacuum is a common issue, often easily resolved with a methodical check guided by your repair manual. Begin by inspecting the dustbin or bag – a full container drastically reduces airflow. Empty or replace it as needed. Next, examine the hose for blockages. Detach it and visually inspect for obstructions; a long, flexible tool can help dislodge debris.
The hose connections at both the vacuum body and the cleaning head are also potential blockage points. Ensure a secure fit. Your repair manual will illustrate how to disassemble these connections for thorough cleaning.
Check the filters! Clogged filters are a primary cause of suction loss. Most Hoover vacuums have multiple filters – pre-motor and post-motor – which require regular cleaning or replacement, as detailed in your manual.
Finally, inspect the brush roll for tangled hair, string, or debris. A clogged brush roll hinders airflow and reduces cleaning effectiveness. Always disconnect the power before accessing the brush roll.
Hoover Brush Roll Not Spinning
A non-spinning brush roll significantly diminishes your Hoover vacuum’s cleaning power. Your repair manual is crucial for diagnosing the cause. First, disconnect the vacuum from the power source! Begin by checking for obstructions – hair, string, or carpet fibers tightly wrapped around the brush roll are frequent culprits. Carefully remove these using scissors or a seam ripper;

Next, inspect the brush roll belt. A broken or stretched belt will prevent the roll from spinning. Your manual will detail how to access and replace the belt; ensure you use the correct replacement part.
If the belt is intact, the motor coupling might be the issue. This component connects the motor to the brush roll. A worn or broken coupling will result in no rotation. Consult your manual for replacement instructions;
Finally, a blockage in the airflow path can sometimes prevent the brush roll from spinning. Refer to the ‘Loss of Suction’ section of your manual to address potential clogs.

Hoover Washing Machine Repair
Hoover washing machine issues are often addressable with the correct manual. Downloadable PDF instructions guide users through diagnostics and repairs, ensuring effective appliance maintenance and longevity.
Hoover Washing Machine Not Draining
A Hoover washing machine failing to drain is a common issue, often resolvable with a methodical approach guided by your appliance’s service manual. Begin by checking the drain hose for kinks or obstructions – a simple visual inspection can often reveal the problem.
Next, locate and inspect the drain pump filter. This filter traps lint, debris, and small objects that can impede water flow. Consult your manual for its specific location, as it varies by model. Carefully remove the filter and clean it thoroughly before reinstalling.
If the filter is clear, the drain pump itself may be faulty. A malfunctioning pump requires replacement, a task best undertaken with the guidance of a detailed repair manual. Always disconnect the power supply before attempting any internal repairs. Finally, verify the drain hose isn’t inserted too far into the drainpipe, potentially creating a siphon effect.
Remember to download the correct manual for your specific Hoover model.
Hoover Washing Machine Not Spinning
When a Hoover washing machine won’t spin, several potential causes exist, and a repair manual is crucial for accurate diagnosis. First, ensure the machine isn’t overloaded; excessive weight can prevent the drum from rotating. Check the lid switch – a faulty switch won’t allow the machine to spin for safety reasons.
Next, examine the drive belt. A worn or broken belt will render the drum immobile. Accessing the belt usually requires removing the back panel of the washing machine; your manual will provide specific instructions. If the belt is intact, the motor coupling may be the issue.
A damaged motor coupling prevents power transfer from the motor to the drum. Replacement is often necessary. Finally, a malfunctioning motor itself could be the culprit, requiring professional assessment. Always disconnect power before any internal inspection, and refer to your Hoover model’s manual for detailed diagrams and safety precautions.
Download the appropriate manual for your machine.
Hoover Washing Machine Error Codes & Meanings
Hoover washing machines utilize error codes to signal malfunctions, and a repair manual is essential for deciphering these signals. These codes provide a quick diagnostic pathway, pinpointing the source of the problem. For example, a code indicating a water inlet issue suggests a problem with the water supply valve or hose.
Drainage errors are commonly indicated by specific codes, pointing to a blocked drain pump or a kinked drain hose. A manual will detail the exact code for each issue. Motor-related errors often signify a faulty motor or a problem with the motor control board.
Temperature sensor errors can also appear, indicating a faulty sensor or wiring issue. Downloading the specific manual for your Hoover model is crucial, as error code meanings can vary between machines. The manual provides step-by-step troubleshooting guidance for each code, enabling efficient repair and minimizing downtime.
Download the appropriate manual for your machine.
Hoover Dryer Repair
Hoover dryer repair often requires a specific service manual for accurate diagnosis and repair. These manuals provide detailed schematics and troubleshooting steps for various dryer issues.
Hoover Dryer Not Heating
Diagnosing a Hoover dryer that won’t heat requires a systematic approach, often detailed within the appliance’s service manual. A common culprit is a faulty heating element, which can be tested for continuity using a multimeter – always disconnect power first! Another frequent issue involves the thermal fuse, a safety device designed to blow if the dryer overheats; a blown fuse needs replacement.
The thermostat is also crucial; it regulates the dryer’s temperature, and a malfunctioning thermostat can prevent heating. Inspect the gas valve (for gas dryers) and the igniter for proper operation. Electrical connections should be checked for looseness or corrosion. Remember to consult the specific service manual for your Hoover dryer model, as wiring diagrams and component locations vary.
Before attempting any repair, ensure the dryer is unplugged and that you understand basic electrical safety. If you are uncomfortable working with electrical components, it’s best to consult a qualified appliance repair technician.
Hoover Dryer Drum Not Tumbling
If your Hoover dryer drum isn’t tumbling, the issue often lies with the drive belt, motor, or associated components. The service manual for your specific model will provide detailed diagrams and instructions for accessing these parts. Begin by checking the drive belt for breakage or slippage; a worn or broken belt will prevent the drum from rotating.

Next, inspect the drum rollers and glides – these support the drum and allow it to spin freely. Worn rollers can cause friction and impede movement. The dryer motor itself could be faulty, though this is less common. Check for obstructions within the dryer housing that might be blocking the drum’s rotation, such as lint buildup or dropped items.
Always disconnect the power supply before attempting any repairs. Refer to the service manual for torque specifications when reassembling components. If you lack experience with appliance repair, seeking professional assistance is recommended.
Hoover Dryer Error Codes Explained
Hoover dryers utilize error codes to diagnose internal issues, simplifying the repair process when referenced with the appropriate service manual. These codes, displayed on the dryer’s control panel, pinpoint the source of the problem, ranging from heating element failures to sensor malfunctions. The manual provides a comprehensive list of these codes and their corresponding meanings.
For example, a code indicating a “thermistor error” suggests a faulty temperature sensor, while a “heating element error” points to a problem with the heating component. Other common codes relate to blocked vents, motor issues, or problems with the door switch. Always consult your dryer’s specific manual, as error code definitions can vary between models.
Before attempting repairs, disconnect the power supply. Understanding these codes empowers you to accurately diagnose the issue and order the correct replacement parts, potentially saving on service call fees. If unsure, professional assistance is advised.
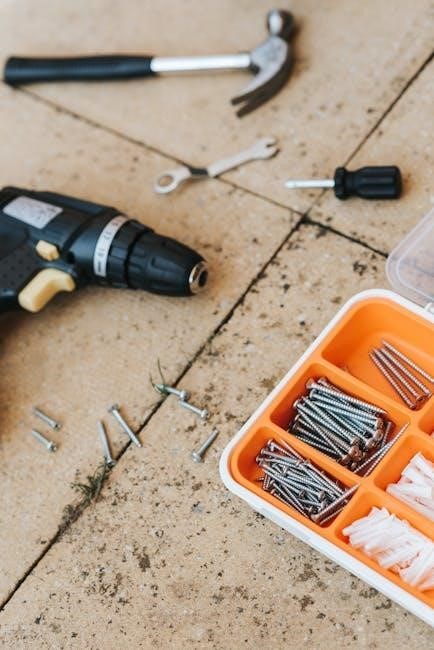
Essential Tools for Hoover Repair
Successful Hoover appliance repair requires both basic hand tools and specialized equipment. A screwdriver set, pliers, and multimeter are fundamental, alongside specific tools for accessing components and testing electrical circuits.
Basic Hand Tools for Hoover Repairs
Embarking on Hoover appliance repair necessitates a foundational set of hand tools readily available to most homeowners. A comprehensive screwdriver set, encompassing both Phillips head and flathead options in various sizes, is paramount for accessing internal components. Pliers, including needle-nose and standard varieties, prove invaluable for gripping, bending, and manipulating wires and connectors.
A good quality adjustable wrench is essential for loosening and tightening nuts and bolts encountered during disassembly and reassembly. Wire strippers and cutters are crucial for safely working with electrical wiring, ensuring clean connections and preventing shorts. A multimeter, even a basic digital model, is indispensable for testing continuity, voltage, and resistance, aiding in diagnosing electrical faults.
Don’t overlook the utility of a putty knife or plastic opening tool for gently prying apart plastic panels without causing damage. A small container for organizing screws and parts prevents loss and streamlines the repair process. Finally, a work light provides adequate illumination, especially when working in dimly lit areas within the appliance.
Specialized Tools for Hoover Appliances
Beyond basic hand tools, certain specialized instruments significantly enhance Hoover appliance repair capabilities. A nut driver set, particularly useful for removing specific fasteners common in Hoover models, offers greater precision than standard wrenches. A socket set, including both metric and imperial sizes, is essential for tackling larger bolts and components.
For vacuum cleaner repairs, a brush roll removal tool simplifies the process of accessing and cleaning or replacing the brush roll. A vacuum pump and manifold gauge set are invaluable for diagnosing refrigeration system issues in Hoover washing machines and dryers that utilize refrigerants. Electrical testers, such as a clamp meter, provide accurate current measurements.
Furthermore, a thermal fuse tester helps identify blown thermal fuses, a common cause of heating problems in dryers. A continuity tester, more sensitive than a multimeter, can pinpoint breaks in wiring. Finally, specialized Hoover-specific tools, often detailed in service manuals, may be required for certain complex repairs, ensuring proper disassembly and reassembly.

Safety Precautions for Hoover Repair
Prioritize electrical safety by disconnecting power before any repair. Follow general appliance repair guidelines, wearing appropriate safety gear, and consulting manuals for specific hazards.
Electrical Safety During Hoover Repair
Working with electricity is inherently dangerous, and Hoover appliance repair is no exception. Always disconnect the appliance from the power source – unplug it from the wall outlet – before commencing any repair work. This is the single most important safety precaution you can take.
Even after unplugging, be aware that some components may retain an electrical charge. If you are dealing with capacitors, discharge them properly using an insulated screwdriver and resistor. Never touch any wiring or electrical components with wet hands or while standing in a damp environment.
Inspect power cords for damage – fraying, cracks, or exposed wires – and replace them if necessary. If you are unsure about any electrical aspect of the repair, consult a qualified electrician. Do not attempt repairs beyond your skill level. Remember, your safety is paramount, and a faulty repair can lead to electric shock, fire, or further damage to the appliance.
Utilize insulated tools designed for electrical work, and avoid working on live circuits. Prioritize safety above all else during any Hoover repair endeavor.
General Safety Guidelines for Appliance Repair
Beyond electrical safety, several general precautions are crucial when undertaking Hoover appliance repair. Wear appropriate personal protective equipment (PPE), including safety glasses to protect your eyes from flying debris and gloves to shield your hands from sharp edges and potential contaminants.
Ensure your workspace is well-lit and organized, free from clutter that could cause trips or falls. Keep children and pets away from the repair area. When disassembling the appliance, take photos or make notes to aid in reassembly – this prevents confusion and ensures all parts are correctly replaced.
Handle components with care, avoiding excessive force that could damage them. Dispose of old parts responsibly, following local regulations for electronic waste. If a repair seems overly complex or you encounter unexpected difficulties, don’t hesitate to seek professional assistance.
Remember, attempting a repair beyond your capabilities can lead to further damage or injury. Prioritize safety and proceed cautiously throughout the entire repair process.