Navigating HVAC system issues demands understanding common problems like electrical faults, refrigerant leaks, and airflow restrictions, alongside crucial maintenance for optimal performance and longevity․
Heating, Ventilation, and Air Conditioning (HVAC) systems are essential for maintaining comfortable and healthy indoor environments․ These systems regulate temperature, humidity, and air quality, impacting both residential and commercial spaces․ Understanding the core components – including furnaces, air conditioners, heat pumps, and ductwork – is crucial for effective troubleshooting․
Common HVAC issues often stem from a lack of regular maintenance, such as neglecting air filter changes or skipping professional inspections․ Electrical problems, refrigerant leaks, and airflow restrictions are frequently encountered․ Recognizing early warning signs, like inconsistent temperatures or unusual noises, can prevent minor issues from escalating into costly repairs․ A proactive approach to HVAC system care ensures efficiency, extends lifespan, and optimizes indoor comfort․
Understanding Common HVAC Components
A typical HVAC system comprises several key components․ The furnace or heat pump generates heat, while the air conditioner provides cooling․ A thermostat controls the system, maintaining the desired temperature․ The blower motor circulates air throughout the ductwork, delivering conditioned air to vents․ Condenser and evaporator coils facilitate heat exchange, utilizing refrigerant to transfer thermal energy․
Capacitors provide the electrical boost needed to start and run motors․ Air filters remove dust and allergens, improving air quality․ Understanding the function of each component is vital for diagnosing problems․ For example, a faulty capacitor can prevent a motor from starting, while a clogged air filter restricts airflow․ Regular inspection and maintenance of these components are essential for optimal system performance and longevity․

Troubleshooting Air Conditioning Issues
Addressing AC problems involves diagnosing issues like insufficient cooling, short cycling, or fan malfunctions, often stemming from dirty filters, leaks, or electrical faults․
AC Not Cooling: Common Causes
When your air conditioner fails to deliver cool air, several culprits could be at play․ A frequently overlooked issue is dirty air filters; these restrict airflow, reducing cooling efficiency and potentially damaging the system․ Similarly, dirty condenser coils impede heat dissipation, hindering the cooling process․
Perhaps more seriously, refrigerant leaks drastically diminish cooling capacity․ Low refrigerant levels signal a leak requiring professional attention, as refrigerant is vital for heat transfer․ Ignoring this can lead to compressor failure․ Regular maintenance, including filter changes and coil cleaning, can prevent many of these issues․ Promptly addressing any cooling decline is crucial for maintaining a comfortable indoor environment and preventing costly repairs․
Dirty Air Filters
Dirty air filters are a remarkably common cause of reduced AC performance and a frequent contributor to the “AC not cooling” problem․ These filters are designed to trap dust, pollen, and other airborne particles, protecting the HVAC system and improving indoor air quality․ However, as they become clogged, airflow is restricted, forcing the AC unit to work harder․
This increased strain reduces cooling efficiency, potentially leading to higher energy bills and even system damage․ A simple solution is regular filter replacement – typically every 1-3 months, depending on usage and filter type․ Checking the filter monthly is a good practice․ Clean filters ensure optimal airflow, allowing the AC to cool effectively and maintain a comfortable indoor climate․
Dirty Condenser Coils
The condenser coil, located in the outdoor unit of your AC system, is responsible for releasing heat․ Over time, this coil can accumulate dirt, debris, leaves, and even grass clippings, hindering its ability to effectively dissipate heat․ This buildup acts as insulation, reducing the coil’s efficiency and causing the AC to struggle to cool your home․
A dirty condenser coil often manifests as an AC that runs constantly but doesn’t provide sufficient cooling․ Regular cleaning is crucial; at least annually, and more frequently in dusty environments․ Carefully remove debris and gently clean the coils with a fin comb and a hose – avoid high pressure that could damage the fins․ Maintaining clean condenser coils ensures optimal heat transfer and efficient AC operation․
Refrigerant Leaks
Refrigerant is the lifeblood of your air conditioning system, responsible for absorbing and releasing heat․ A leak, even a small one, can significantly reduce cooling capacity and force the system to work harder, leading to increased energy bills and potential compressor damage․
Signs of a refrigerant leak include ice forming on the evaporator coil or refrigerant lines, a hissing sound near the AC unit, and consistently warm air blowing from the vents․ Detecting and repairing refrigerant leaks requires a trained HVAC technician, as handling refrigerant requires specialized equipment and certification․ Attempting to repair a leak yourself is not recommended and can be harmful to the environment․ Professional leak detection and repair are essential for restoring AC performance and preventing further damage․
AC Constantly Turning On and Off (Short Cycling)
Short cycling, where your AC unit rapidly cycles on and off, is a common issue indicating an underlying problem․ This behavior stresses the compressor, reduces efficiency, and shortens the lifespan of your system․ Several factors can contribute to short cycling, demanding careful diagnosis․
Common causes include a dirty air filter restricting airflow, a dirty condenser coil hindering heat dissipation, or an improperly located thermostat sensing inaccurate temperatures․ A frozen evaporator coil, often caused by restricted airflow, can also trigger short cycling․ Addressing these issues promptly is crucial․ Ignoring short cycling can lead to costly repairs or even complete system failure․ Professional evaluation is recommended to pinpoint the exact cause and implement the appropriate solution․
Improperly Located Thermostat
A thermostat’s location significantly impacts its accuracy and, consequently, your AC’s performance․ If positioned in direct sunlight, near heat-generating appliances, or in a drafty area, the thermostat will misread the room’s temperature․ This leads to the AC short cycling – turning on and off frequently – as it struggles to maintain the setpoint․
For accurate readings, the thermostat should be mounted on an interior wall, away from direct sunlight, heat sources like lamps or ovens, and drafts from windows or doors․ Ensure good airflow around the thermostat; avoid placing it behind furniture or curtains․ Relocating the thermostat to a more suitable location can resolve short cycling issues and improve overall cooling efficiency․
Frozen Evaporator Coil
A frozen evaporator coil is a common cause of AC short cycling and reduced cooling capacity․ This occurs when airflow across the coil is restricted, often due to a dirty air filter, blocked vents, or a malfunctioning blower motor․ Restricted airflow causes the refrigerant to become too cold, leading to ice formation on the coil․
The AC will then shut down to protect itself, resulting in short cycles․ To address this, immediately turn off the AC and replace the air filter․ Ensure all vents are open and unobstructed․ If the problem persists, a professional HVAC technician should inspect the blower motor and refrigerant levels․ Allowing the ice to melt completely before restarting the system is crucial to prevent further damage․
AC Fan Not Working
When your AC fan isn’t functioning, it significantly impacts cooling performance and can lead to system overheating․ Several factors can cause this issue, ranging from simple electrical problems to motor failures․ First, check the circuit breaker to ensure it hasn’t tripped․ A faulty capacitor is a frequent culprit, preventing the motor from starting․
Inspect the fan blades for obstructions that might be hindering movement․ If the motor seems unresponsive, it may require replacement․ Attempting to repair a fan motor yourself can be dangerous due to electrical components; professional assistance is recommended․ A non-functioning fan can also indicate a more significant electrical issue within the HVAC system, necessitating a thorough inspection by a qualified technician․

Troubleshooting Heating Issues

Addressing heating problems involves checking thermostat settings, pilot lights, burners, and heat exchangers, alongside diagnosing blower motor issues for efficient warmth․
No Heat: Common Causes
When your heating system fails to deliver warmth, several culprits could be at play․ A frequent issue is a thermostat malfunction – ensure it’s set correctly, has fresh batteries, and is communicating with the system․ For gas furnaces, pilot light issues are common; a blown pilot light requires relighting following manufacturer instructions․
Additionally, a faulty gas valve can prevent gas from reaching the burners․ Electrical problems, like a tripped circuit breaker or a blown fuse, can also halt operation․ Inspect the furnace’s safety switch, which may have tripped due to overheating or another issue․ Finally, consider a blocked flue, preventing proper venting of exhaust gases, triggering a safety shutdown․ Regular maintenance can help prevent these issues․
Thermostat Malfunctions
A thermostat that isn’t accurately reading or transmitting temperature signals is a prime suspect when facing heating problems․ First, verify the thermostat is set to “Heat” and the desired temperature is higher than the current room temperature․ Check the batteries; low batteries can cause erratic behavior or a completely unresponsive display․
Ensure the thermostat is level and free from drafts or direct sunlight, which can skew readings․ A dirty thermostat can also cause issues, so gently clean the exterior․ If the thermostat is digital, try resetting it to factory defaults․ For older mechanical thermostats, inspect the internal components for damage or corrosion․ If problems persist, a replacement thermostat might be necessary․
Pilot Light Issues (Gas Furnaces)
For gas furnaces, a consistently extinguished pilot light is a common cause of no heat․ Before attempting to relight, ensure the area smells strongly of gas – if it does, ventilate the space immediately and call a professional․ Follow the furnace’s instructions carefully for relighting; typically, this involves pressing and holding a button while igniting the pilot․
If the pilot light won’t stay lit, a faulty thermocouple is often the culprit․ The thermocouple senses the heat from the pilot and allows gas flow; if it fails, the gas valve shuts off as a safety measure․ A dirty pilot orifice can also prevent proper ignition․ Never attempt to repair gas lines yourself; always consult a qualified HVAC technician for gas furnace issues․
Insufficient Heat
Experiencing lukewarm air instead of comforting warmth often points to issues beyond a completely failed system․ Dirty burners, common in gas furnaces, restrict proper combustion, reducing heat output․ Regular cleaning by a professional ensures efficient operation․
A cracked or failed heat exchanger is a serious concern, potentially leaking dangerous carbon monoxide․ Symptoms include soot buildup around the furnace and a lack of consistent heat․ Immediate professional inspection is crucial for safety․ Additionally, restricted airflow due to dirty filters or blocked vents can limit heat distribution․ Addressing these airflow problems alongside burner or heat exchanger issues will restore adequate heating․
Dirty Burners (Gas Furnaces)
Gas furnace burners require clean operation for efficient heat production․ Soot, dust, and debris accumulation obstruct the flame, leading to incomplete combustion and reduced heating capacity․ This results in a noticeable drop in temperature and increased gas consumption as the furnace works harder․
Visual inspection reveals a yellow or orange flame instead of a crisp blue one, indicating incomplete combustion․ Professional cleaning is recommended, involving disassembly and thorough cleaning of the burners and associated components․ Attempting this yourself can be dangerous; always prioritize safety and call a qualified HVAC technician․ Regular burner cleaning, as part of annual furnace maintenance, prevents this issue and ensures optimal performance․
Failed Heat Exchanger

A cracked or corroded heat exchanger represents a serious safety hazard in gas furnaces․ This component separates combustion gases from the air circulated throughout your home․ A failure allows dangerous carbon monoxide (CO) to leak into your living space, posing a life-threatening risk․
Symptoms include the smell of exhaust fumes, soot around the furnace, and unexplained headaches or flu-like symptoms among occupants․ CO detectors are crucial for early warning, but professional inspection is vital․ A technician will use specialized tools to assess the heat exchanger’s integrity․ Replacement is typically the only safe solution; repairs are rarely feasible․ Ignoring this issue can have devastating consequences, emphasizing the importance of regular maintenance and prompt attention to warning signs․
Blower Motor Problems
The blower motor is essential for circulating air throughout your HVAC system, impacting both heating and cooling․ Issues can range from a completely failed motor to reduced airflow or unusual noises․ Common causes include capacitor failure, worn bearings, or a malfunctioning motor itself․
A failing capacitor often presents as a motor that hums but doesn’t start․ Worn bearings create squealing or grinding sounds․ Reduced airflow indicates the motor isn’t running at full speed․ Electrical issues, like wiring problems, can also contribute․ Professional diagnosis is recommended, as working with electrical components can be dangerous․ Repair or replacement depends on the severity of the problem and the motor’s age, ensuring consistent and efficient air distribution․
Electrical Issues in HVAC Systems
Tripped circuit breakers, faulty capacitors, and wiring problems are frequent electrical concerns in HVAC systems, demanding careful inspection and professional repair for safety․
Tripped Circuit Breakers
A frequently tripped circuit breaker is a common signal of an electrical issue within your HVAC system․ It doesn’t always indicate a major problem, but ignoring it can lead to significant damage or even a fire hazard․ Often, a tripped breaker is a protective measure, preventing overheating due to a surge in electrical demand․
However, persistent tripping suggests an underlying problem․ This could stem from a short circuit, an overloaded circuit (too many appliances on the same circuit), or a failing component within the HVAC unit itself, like the compressor or fan motor․ Before resetting the breaker repeatedly, investigate potential causes․
Check for obvious signs of damage or overheating․ If the breaker trips immediately upon resetting, do not continue to reset it․ Contact a qualified HVAC technician to diagnose and repair the issue safely and effectively․ Ignoring this warning sign can escalate a minor problem into a costly and dangerous situation;
Faulty Capacitors
Capacitors are essential components within HVAC systems, primarily responsible for providing the electrical boost needed to start and run motors – particularly those powering fans and compressors․ A failing capacitor is a frequent cause of HVAC malfunctions, often presenting as a motor that hums but doesn’t start, or runs weakly and inconsistently․
These components degrade over time due to heat and electrical cycling․ Signs of a faulty capacitor include bulging, leaking, or physical damage․ Diagnosing a bad capacitor requires a multimeter to test its capacitance; however, this should be performed by a qualified technician due to the risk of electrical shock․
Replacing a faulty capacitor is generally a relatively inexpensive repair, but it’s crucial to use the correct replacement part with the appropriate voltage and microfarad (µF) rating․ Attempting to repair or replace capacitors without proper training can be dangerous and potentially damage the HVAC system․
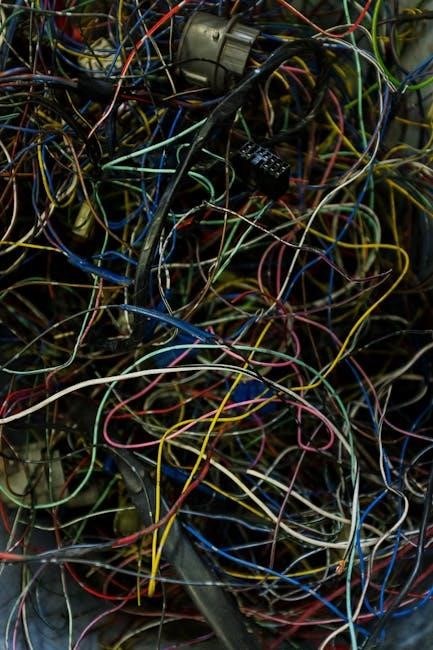
Wiring Problems
Electrical wiring issues represent a significant category of HVAC problems, ranging from loose connections to corroded wires and complete circuit failures․ These problems can manifest in various ways, including intermittent operation, complete system shutdowns, or even electrical hazards like shocks or fires․
Loose connections are common, especially in older systems, due to vibration and temperature fluctuations․ Corrosion can occur in humid environments, weakening connections and increasing resistance․ Damaged wiring insulation poses a serious safety risk․ Identifying wiring problems requires a systematic inspection of all electrical components, checking for frayed wires, loose terminals, and signs of burning․
Due to the inherent dangers of working with electricity, diagnosing and repairing wiring issues should always be performed by a qualified HVAC technician․ Improper repairs can exacerbate the problem and create further safety hazards․

Airflow Problems
Restricted airflow, stemming from blocked vents or ductwork leaks, significantly reduces HVAC efficiency and comfort, demanding prompt inspection and repair for optimal system function․
Blocked Vents
Blocked vents are a surprisingly common cause of airflow problems within your HVAC system․ Furniture, rugs, curtains, or even accumulated dust can obstruct these vital pathways, hindering the free flow of conditioned air throughout your home․ This restriction forces your HVAC unit to work harder, leading to increased energy consumption and potentially shortening its lifespan․
Regularly inspect all supply and return vents in each room, ensuring they are clear of any obstructions․ Pay close attention to vents hidden behind furniture or covered by décor․ A simple visual check can often identify the issue․ Addressing blocked vents is a straightforward DIY fix that can immediately improve your system’s performance and your home’s comfort․ Don’t underestimate the impact of clear airflow!
Ductwork Leaks
Ductwork leaks represent a significant source of energy loss in many homes, impacting HVAC efficiency and comfort․ Over time, the seals around duct joints can deteriorate, creating gaps where conditioned air escapes into unconditioned spaces like attics, crawlspaces, or wall cavities․ This forces your system to work harder to maintain the desired temperature, leading to higher energy bills․
Identifying ductwork leaks can be challenging, but signs include inconsistent temperatures between rooms and increased energy consumption․ Professional duct sealing is highly recommended, utilizing methods like mastic sealant or metal tape to effectively close these gaps․ Addressing ductwork leaks is a cost-effective way to improve your HVAC system’s performance and reduce your carbon footprint․
Maintenance and Prevention
Proactive HVAC maintenance, including regular filter replacements and professional inspections, prevents costly repairs and ensures optimal system efficiency and prolonged operational lifespan․
Regular Filter Changes
Maintaining clean air filters is arguably the simplest, yet most impactful, preventative HVAC measure homeowners can take․ Dirty filters restrict airflow, forcing your system to work harder, leading to reduced efficiency and potential component failure․ This increased strain can manifest as higher energy bills and a shortened lifespan for your furnace or air conditioner․
Filters should be checked monthly, and replaced every 1-3 months, depending on factors like pet ownership, allergies, and air quality․ Using a higher MERV-rated filter can improve air quality by capturing more particles, but ensure your system can handle the increased resistance․ Neglecting filter changes is a common cause of AC issues like short cycling and reduced cooling capacity, and heating problems like insufficient heat․ A small investment in filters yields significant long-term benefits․
Professional HVAC Maintenance
While DIY maintenance is valuable, annual professional HVAC maintenance is crucial for comprehensive system health․ A qualified technician performs in-depth inspections, cleaning, and tune-ups that go beyond homeowner capabilities․ This includes checking refrigerant levels, inspecting electrical connections, lubricating moving parts, and assessing the overall system performance․
Professional maintenance can identify and address minor issues before they escalate into costly repairs․ Technicians utilize specialized tools and expertise to optimize efficiency, ensuring your system operates at peak performance․ Regular servicing also often maintains warranty validity․ Investing in professional care extends the lifespan of your HVAC system, reduces energy consumption, and provides peace of mind knowing your home’s comfort is in expert hands․