
Singer’s Tradition line embodies 170 years of sewing innovation, offering reliable machines for all skill levels, backed by comprehensive manuals and support․
Explore a range of PDF user guides for models like the 2273 and 2282, ensuring a seamless sewing experience with your new machine․

Historical Background of Singer
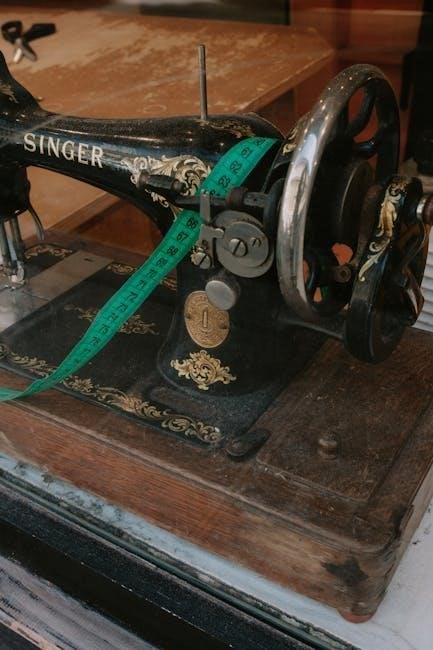
Singer’s legacy began in 1851 with Isaac Singer’s patent for the first practical sewing machine, revolutionizing garment construction and home crafting․ This pivotal invention spurred the company’s rapid growth, establishing Singer as a household name synonymous with quality and innovation․
For over a century and a half, Singer has continuously refined its designs, adapting to evolving sewing needs․ The Tradition line represents this ongoing commitment, building upon a foundation of dependable mechanics and user-friendly features․ Accessing the correct manual, often available as a PDF, is crucial for understanding and maintaining these machines, ensuring they continue the Singer tradition of lasting performance․
Singer’s dedication to providing resources, like detailed manuals, underscores its commitment to customer satisfaction and the longevity of its products․
The Tradition Line: Overview
The Singer Tradition line offers a diverse selection of sewing machines designed to cater to a wide range of skill levels, from beginners to experienced sewers․ These machines blend classic Singer reliability with modern features, providing versatility for various projects․
Models like the 2273 and 2282 are popular choices, known for their ease of use and durable construction․ A key component to maximizing your machine’s potential is the user manual, often available as a downloadable PDF․ These manuals provide step-by-step instructions, troubleshooting tips, and valuable insights into your machine’s capabilities․
Understanding your manual ensures you can fully utilize the Tradition line’s features and enjoy a seamless sewing experience․
Understanding Your Machine: Parts and Functions
Singer Tradition machine manuals detail each component – from the bobbin winding system to needle mechanisms – ensuring proper function and maintenance․
Main Components Identification
Singer Tradition sewing machine manuals provide detailed diagrams identifying key parts․ These include the power switch, handwheel, spool pin, bobbin winder, tension dial, stitch length dial, stitch width dial, needle clamp, presser foot, and presser foot lever․
Understanding these components is crucial for operation․ The manual clarifies the function of each part, like the top-load bobbin system found in models like the Tribute 150C․ It also explains the purpose of the needle and presser foot mechanisms, vital for fabric handling․ Referencing the manual’s illustrations ensures correct identification and usage, maximizing your sewing experience․
Bobbin Winding System
Singer Tradition sewing machine manuals dedicate sections to the bobbin winding process․ Typically, this involves placing the spool on the spool pin, guiding the thread through tension discs, and onto the bobbin․ The manual illustrates how to engage the bobbin winder and initiate winding using the handwheel․
Proper winding ensures even thread distribution․ Manuals emphasize using genuine Singer bobbins for optimal performance․ They also detail troubleshooting steps for common issues like uneven winding or thread breakage․ Following the manual’s instructions guarantees a correctly wound bobbin, essential for consistent stitch quality and preventing machine malfunctions․
Thread Tension Control
Singer Tradition sewing machine manuals explain thread tension as crucial for balanced stitches․ The manual details the tension dial’s function – adjusting the pull on the upper thread․ Incorrect tension leads to looping or puckering․ Manuals provide guidance on identifying these issues and adjusting the dial accordingly․
They often include test-sewing instructions to assess tension․ Different fabric types and thread weights require varying tension settings, as highlighted in the manual․ Proper tension ensures secure, even stitches․ Singer manuals emphasize that consistent tension is key to achieving professional-looking results and preventing thread breakage․
Needle and Presser Foot Mechanisms
Singer Tradition sewing machine manuals detail the needle clamp screw’s role in securing the needle, emphasizing correct insertion․ They explain how the presser foot applies pressure, feeding fabric evenly․ Manuals illustrate different presser foot types – standard, zipper, buttonhole – and their specific uses․
Adjusting presser foot pressure is covered, crucial for delicate or thick fabrics․ The manual clarifies how to raise and lower the presser foot using the lever․ Proper needle and foot alignment are vital for stitch quality․ Singer manuals stress regular checks and cleaning to ensure smooth operation and prevent skipped stitches․
Setting Up Your Machine
Singer Tradition machine manuals guide users through powering on, initial checks, and proper bobbin/thread insertion for optimal performance and sewing success․
Powering On and Initial Checks
Before beginning, consult your Singer Tradition sewing machine manual for specific instructions related to your model․ Ensure the power switch is in the ‘off’ position․ Connect the power cord securely to a grounded outlet․
Upon powering on, verify the machine illuminates and operates smoothly․ Check that the handwheel turns freely without resistance․ Inspect the needle and presser foot; ensure they are correctly installed and securely fastened․ Confirm the bobbin is properly inserted, following the manual’s step-by-step guide․
Finally, always test the machine on a scrap fabric before starting your project to confirm proper stitch formation and tension․ Refer to the manual for troubleshooting if any issues arise during these initial checks․
Bobbin Insertion – Step-by-Step
Consult your Singer Tradition sewing machine manual for visual diagrams specific to your model․ Begin by placing the bobbin onto the bobbin winder spindle․ Engage the bobbin winder by pushing it to the right․ Press the foot pedal gently to wind the bobbin evenly, stopping when full․
Next, open the bobbin case cover․ Depending on your model, the bobbin may be front-loading or top-loading․ For top-loading, simply drop the bobbin into the case, ensuring it rotates freely․ For front-loading, insert the bobbin following the diagram in your manual, guiding the thread through the tension slot․
Finally, close the bobbin case cover and draw up the bobbin thread, referencing your manual for proper threading path․
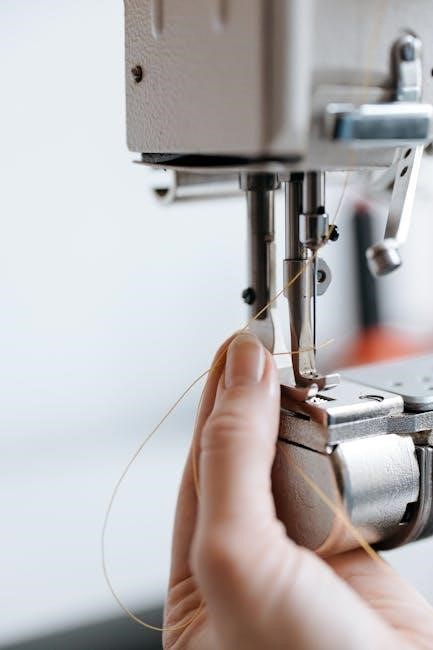
Threading the Machine (Upper Thread)
Refer to your Singer Tradition sewing machine manual for a detailed threading diagram․ Begin by raising the presser foot and the needle to its highest position․ Place the spool of thread on the spool pin․ Guide the thread through the first thread guide, then around the tension discs – ensuring it seats firmly between them․
Continue threading through the take-up lever, then down and around the bobbin winder․ Next, thread the needle from front to back, following the manual’s illustration․ Pull several inches of thread through the needle eye․ Your machine is now ready for lower threading!
Threading the Machine (Lower Thread)
Consult your Singer Tradition sewing machine manual for specific instructions, as models vary․ Typically, the Tradition line utilizes a top-loading drop-in bobbin system․ Ensure the machine is powered off․ Open the bobbin cover and insert a Husqvarna bobbin (recommended) into the bobbin holder․
Draw up the bobbin thread by gently holding the upper thread and turning the handwheel towards you․ Guide the bobbin thread through the thread guide, ensuring both upper and lower threads are trailing behind the presser foot․ Proper threading is crucial for stitch formation!
Basic Sewing Techniques
Singer Tradition machines excel at fundamental stitches like straight and zigzag, detailed in your manual, enabling mending, quilting, and creative projects easily․
Straight Stitching
Straight stitching is the foundation of most sewing projects, and your Singer Tradition machine excels at this basic technique․ Consult your manual for precise stitch length adjustments, typically ranging from 1․0 to 4․0 mm, depending on the fabric weight and desired strength․
Begin by threading the machine correctly, as illustrated in the manual, and winding a bobbin․ Practice on scrap fabric to achieve consistent stitch quality․ Maintain a consistent seam allowance, using the markings on the needle plate as a guide․ The manual will detail how to adjust the presser foot pressure for optimal fabric feed․
For thicker fabrics, a longer stitch length is recommended, while finer fabrics benefit from shorter stitches․ Remember to backstitch at the beginning and end of each seam to secure the stitches, as explained in your manual․
Zigzag Stitching
Zigzag stitching offers versatility beyond straight seams, ideal for finishing raw edges, creating decorative elements, and sewing stretch fabrics․ Your Singer Tradition machine’s manual details how to adjust both stitch length and width․ A narrower width (around 1․0mm) is suitable for reinforcing edges, preventing fraying, while wider widths (up to 5․0mm or more) create bolder designs․
Refer to your manual for specific settings based on fabric type․ Lighter fabrics require shorter stitch lengths and narrower widths․ Practice on scrap fabric to master tension control, ensuring the zigzag stitch lies flat and doesn’t pucker․
The manual will also explain how to utilize the zigzag stitch for buttonholes and appliqué, expanding your creative possibilities with your Singer Tradition machine․
Adjusting Stitch Length and Width
Your Singer Tradition sewing machine’s manual provides detailed instructions on adjusting stitch length and width, crucial for achieving optimal results on various fabrics․ Typically, dials or digital controls allow precise adjustments․ Shorter stitch lengths (e․g․, 1․5mm) are ideal for delicate fabrics and fine details, while longer lengths (e․g․, 3․0mm) are suitable for heavier materials and quicker sewing․
Stitch width controls the side-to-side movement of the needle, impacting the appearance and function of stitches like zigzag․ The manual illustrates how different widths affect fabric edge finishing and decorative stitching․ Always test settings on scrap fabric before starting your project․
Refer to the manual’s chart for recommended settings based on fabric type and desired stitch effect․
Advanced Features & Techniques
Singer Tradition machine manuals detail techniques like buttonholes, zipper insertion, and potentially overlock stitching, expanding your sewing capabilities․
Unlock creative potential with detailed guidance for more complex projects․
Buttonhole Sewing
Singer Tradition sewing machine manuals provide detailed, step-by-step instructions for achieving perfectly finished buttonholes․ These guides typically illustrate how to select the appropriate buttonhole foot and stitch settings on your machine․
The manual will explain how to measure your button size accurately, as this is crucial for creating a correctly sized buttonhole․ It will also guide you through the process of stabilizing the fabric to prevent puckering or distortion during sewing․
Furthermore, the manual will demonstrate how to utilize the machine’s automatic buttonhole feature, if equipped, or how to create buttonholes manually with precision․ Proper threading and tension adjustments are also emphasized for optimal results, ensuring professional-looking buttonholes every time․
Zipper Insertion
Singer Tradition sewing machine manuals offer comprehensive guidance on inserting various zipper types, including standard, invisible, and centered zippers․ These guides detail selecting the correct zipper foot – a crucial step for achieving professional results․
The manual illustrates how to properly position the zipper teeth under the presser foot and adjust stitch length for secure and aesthetically pleasing seams․ It emphasizes the importance of pinning the zipper tape accurately to the fabric before sewing․
Detailed diagrams demonstrate techniques for starting and ending seams cleanly, preventing puckering, and ensuring the zipper operates smoothly․ The manual also covers troubleshooting common issues like uneven stitching or zipper jams, helping you achieve flawless zipper applications․
Overlock Stitching (if applicable)
While not all Singer Tradition models feature a dedicated overlock stitch, some offer a zigzag stitch that can simulate an overlock finish․ The manual details how to adjust stitch width and length to create a secure, professional edge, preventing fabric fraying․
It explains the importance of using appropriate thread types for optimal overlock-style stitching and provides guidance on achieving consistent stitch formation․ The manual illustrates techniques for sewing curves and corners with the simulated overlock stitch․

For models without a dedicated overlock, the manual may suggest utilizing a separate serger machine for true overlocking, highlighting Singer’s range of serger options․ It emphasizes the benefits of a serger for professional garment construction․

Maintenance and Troubleshooting
Singer’s manuals provide detailed cleaning instructions, oil point diagrams, and solutions for common issues, ensuring your Tradition machine operates smoothly for years․
Cleaning Your Sewing Machine
Regular cleaning, as detailed in your Singer Tradition sewing machine manual, is crucial for optimal performance and longevity․ Always power off and disconnect the machine before beginning․ Use a soft brush to remove lint and dust from the bobbin area, feed dogs, and around the needle plate․
The manual will guide you on safely accessing and cleaning these areas․ A small vacuum cleaner attachment can also be helpful․ Wipe down the exterior with a damp cloth; avoid harsh chemicals․ Oil points, as indicated in the manual, should be lubricated periodically to ensure smooth operation․ Ignoring cleaning can lead to malfunctions and reduced stitch quality, so follow the manual’s recommendations diligently․
Oil Points and Lubrication
Your Singer Tradition sewing machine manual precisely identifies key oil points essential for smooth operation․ Regular lubrication prevents friction and wear, extending the machine’s lifespan․ Use only Singer-recommended sewing machine oil; other oils can cause build-up and damage․
Apply a small drop to each designated point – typically around the bobbin area, hook, and motor components – as illustrated in the manual․ Avoid over-oiling, as excess oil attracts lint․ After oiling, run the machine briefly to distribute the lubricant․ Consult your manual for the recommended oiling frequency, which varies depending on usage․ Proper lubrication, guided by the manual, ensures consistent stitch quality․
Common Problems and Solutions
The Singer Tradition sewing machine manual offers troubleshooting guidance for frequent issues․ Thread bunching often indicates incorrect threading or tension; re-thread following the manual’s diagrams․ If the needle breaks, ensure it’s the correct type and size for your fabric, as detailed in the manual․

Skipped stitches can stem from a dull or improperly inserted needle – consult the manual for replacement instructions․ A jammed bobbin usually requires careful removal and re-insertion, guided by the manual’s illustrations․ Always unplug the machine before attempting repairs․ Refer to the manual’s extensive FAQ section for further assistance and detailed solutions․

Safety Precautions
Singer’s manual emphasizes unplugging the machine before repairs, using correct needles, and keeping fingers clear of the needle area for safe operation․
General Safety Guidelines
Singer sewing machine manuals consistently prioritize user safety․ Always read the entire manual before operating your Tradition machine to understand its features and potential hazards․ Keep the machine in good working order through regular maintenance, as outlined in the manual․
Never operate the machine if it’s damaged or malfunctioning․ Ensure the power switch is off before threading, changing the needle, or performing any maintenance․ Avoid using excessive force when operating the machine; let the machine do the work․ Keep the machine’s surfaces clean and free from debris․
Supervise children when they are near the sewing machine․ Store the machine in a safe, dry location when not in use․ Following these guidelines will help ensure a safe and enjoyable sewing experience․
Electrical Safety
Your Singer Tradition sewing machine manual emphasizes crucial electrical safety precautions․ Always verify the voltage indicated on the machine matches your power supply before plugging it in․ Never operate the machine with a damaged power cord or plug; replace them immediately․
Avoid using extension cords if possible, and if necessary, ensure they are properly grounded and rated for the machine’s power requirements․ Do not expose the machine to water or moisture, as this poses an electrical shock hazard․ Always unplug the machine before cleaning or performing any maintenance․
Never attempt to repair the machine’s electrical components yourself; seek qualified service personnel․ Following these guidelines will minimize the risk of electrical shock and ensure safe operation․
Needle Safety
The Singer Tradition sewing machine manual stresses the importance of needle safety․ Always unplug the machine before changing the needle to prevent accidental activation․ Use only Singer-approved needles of the correct type and size for your fabric․
Insert the needle fully into the needle clamp, ensuring it’s securely fastened․ Never sew over pins or thick materials that could bend or break the needle․ A broken needle can cause injury and damage the machine․
Dispose of broken needles carefully to avoid accidental pricks․ Keep fingers away from the needle area while the machine is running․ Regularly inspect the needle for damage and replace it when necessary․
Resources and Support
Singer’s website provides extensive resources, including downloadable manuals in PDF format for the Tradition line, plus FAQs and local repair service locators․
Singer Website and Online Manuals
Singer’s official website is a comprehensive hub for all your sewing machine needs, particularly regarding the Tradition series․ You can directly access and download PDF versions of user manuals for specific models like the 2273 and 2282, eliminating the need for physical copies․
These online manuals offer detailed instructions, troubleshooting guides, and diagrams to assist with setup, operation, and maintenance․ Beyond model-specific manuals, the website features a wealth of support materials, including frequently asked questions (FAQs), how-to videos, and helpful articles covering various sewing techniques․
Singer also provides access to a searchable database of parts and accessories, ensuring you can easily find replacements or upgrades for your Tradition machine․ Regularly checking the website for updates and new resources is recommended to maximize your sewing experience․
Finding Local Repair Services
While the manual for your Singer Tradition sewing machine offers troubleshooting guidance, professional repair may sometimes be necessary․ Singer’s website provides a dealer locator tool to help you find authorized repair centers in your area․
These authorized service providers possess the expertise and genuine Singer parts to diagnose and fix any issues with your machine, ensuring optimal performance․ Alternatively, independent sewing machine repair shops can also offer reliable service․
When selecting a repair service, consider their experience with Singer machines, customer reviews, and turnaround time․ Before bringing in your machine, consult your manual for any specific preparation steps or information about the problem you’re experiencing․
Frequently Asked Questions (FAQ)
Q: Where can I find a digital copy of my Singer Tradition sewing machine manual? A: Singer’s official website offers a vast library of PDF manuals, including those for the Tradition line․ Simply search by model number․
Q: What if I can’t find the manual for my specific model? A: Contact Singer’s customer support; they can often provide a digital copy or guide you to relevant resources․
Q: Does the manual cover basic maintenance? A: Yes, the manual details cleaning, oiling points, and troubleshooting common issues․ Q: What if my machine still malfunctions after following the manual’s instructions? A: Seek assistance from a qualified repair service․