DieHard Battery Charger Owners Manual: A Comprehensive Guide
This manual provides essential guidance for DieHard charger models like DH0168, 71219-CA, 71225, and 200.71315, ensuring safe and effective battery charging and maintenance.
DieHard battery chargers have a longstanding reputation for reliability and performance, serving both home and professional users for decades. This comprehensive guide focuses on maximizing the lifespan and efficiency of your DieHard charger, covering models such as the DH0168 (Gold 2-in-1), 71219-CA (Automatic 12V 2 Amp), 71225 (Microprocessor Controlled), and 200.71315 (15/25/125 AMP).
Whether you require manual control or fully automatic operation, understanding your charger’s features and adhering to safety precautions are paramount. This manual will detail proper usage, troubleshooting, and maintenance procedures to ensure optimal performance and longevity of your DieHard investment.
Understanding DieHard Charger Models
DieHard offers a diverse range of battery chargers to suit various needs. The DieHard Gold 2-in-1 (DH0168) provides manual control alongside a powerful 200A engine starter. The Automatic 12V 2 Amp Charger/Maintainer (71219-CA) offers convenient, hands-free operation for maintaining battery health. For advanced features, the Microprocessor Controlled Charger (71225) includes battery and alternator testing capabilities.
Finally, the DieHard 15/25/125 AMP Charger (200.71315) delivers high amperage for faster charging of larger batteries. Each model possesses unique characteristics, detailed within this manual, to optimize performance.
DieHard Gold 2-in-1 12V Manual Charger (DH0168)
The DieHard Gold 2-in-1 (DH0168) is a versatile charger combining manual charging with a robust 200A engine starter. This wheeled model, available at Advance Auto Parts, offers users complete control over the charging process, setting amperage as needed. It’s ideal for those preferring a hands-on approach. Beyond charging, its 40A boost function quickly jump-starts vehicles.
Its 6A charging capability suits various 12V batteries. Remember to consult the manual for proper settings and safety precautions during operation and engine starting.
DieHard Automatic 12V 2 Amp Charger/Maintainer (71219-CA)
The DieHard 71219-CA is a fully automatic 2-Amp, 6/12V battery charger and maintainer, renowned for its reliability and quality – hallmarks of the DieHard brand. Available at Ace Hardware, this charger simplifies battery care with its automatic operation, switching between charging and maintaining modes as needed. It’s designed for convenience and longevity, ideal for seasonal vehicle storage or consistent battery upkeep.
This model eliminates the need for manual monitoring, ensuring batteries remain optimally charged without overcharging.
DieHard Microprocessor Controlled Charger (71225)
The DieHard Model 71225 is a sophisticated microprocessor-controlled, fully automatic battery charger, offering advanced features for both home and light commercial use. This versatile unit includes an engine starter, battery, and alternator tester, providing comprehensive battery management capabilities. Its intelligent design ensures optimal charging cycles, extending battery life and performance.
The microprocessor control allows for precise charging, adapting to different battery types and conditions, making it a valuable tool for any vehicle enthusiast or professional.
DieHard 15/25/125 AMP Charger (200.71315)
The DieHard Model 200.71315 is a fully automatic 15/25/125 AMP battery charger and engine starter, designed for robust performance and versatility. This charger offers multiple amperage settings to accommodate various battery sizes and charging needs. Prior to use, carefully read and follow all safety rules and operating instructions detailed within this owner’s manual.
Its automatic functionality simplifies the charging process, while the engine starter provides a convenient boost when needed, ensuring reliable operation for a wide range of vehicles.
Safety Precautions
Prioritizing safety is crucial when operating a DieHard battery charger. Always read and adhere to all safety rules and operating instructions before each use. Ensure adequate ventilation during charging to prevent hydrogen gas buildup, which is explosive. Never charge a frozen battery, and disconnect the charger before attempting any connections or disconnections.
Wear appropriate eye protection and avoid contact with battery acid. Keep the charger dry and store it in a secure location, away from flammable materials. Improper use can result in damage or injury.
General Safety Rules
Always inspect the charger and cables for damage before use; do not operate if compromised. Ensure a properly grounded outlet is used, and avoid operating in wet or damp conditions. Never reverse polarity connections – red to negative and black to positive – as this can cause sparking and potential explosions.
Keep children and unauthorized personnel away from the charging area. Do not attempt to modify the charger in any way. Disconnect the charger from the AC power source before making any connections or disconnections to the battery.
Battery Safety Guidelines
Batteries produce explosive gases; charge in a well-ventilated area. Avoid creating sparks near batteries, as hydrogen gas is flammable. Wear appropriate eye protection (safety glasses or a face shield) and gloves when working with batteries. Never smoke or use open flames near a charging battery.
If battery acid contacts skin or clothing, immediately flush with plenty of water and seek medical attention. Properly dispose of old batteries according to local regulations. Do not charge frozen batteries.
Charger Handling and Storage
Always unplug the charger before inspecting, cleaning, or storing it. Ensure the charger has cooled down completely before handling or storing. Store the charger in a dry, cool, and well-ventilated location, away from extreme temperatures and humidity. Keep the charger out of reach of children.
Avoid dropping or subjecting the charger to physical shock. Regularly inspect the cables and clamps for damage, and replace them if necessary. Do not attempt to disassemble or repair the charger yourself.

Charger Components and Features
DieHard chargers boast robust features for optimal battery care. Key components include durable charger terminals and clamps for secure connections. A user-friendly control panel provides intuitive operation and monitoring of the charging process. Select models, like the DH0168, feature a convenient wheeled design for enhanced portability and maneuverability.
Some chargers also incorporate advanced functionalities like engine starting capabilities and integrated battery/alternator testing, offering a comprehensive solution for vehicle maintenance needs.
Charger Terminals and Clamps
DieHard battery chargers utilize high-quality terminals and clamps designed for secure and efficient current transfer. These components are crucial for establishing a reliable connection to the battery posts, ensuring optimal charging performance. The clamps are typically constructed from durable materials to resist corrosion and maintain a firm grip.
Proper connection is vital; ensure a clean contact surface on both the clamps and battery terminals for maximum conductivity and to prevent voltage drop during the charging cycle.
Control Panel Overview
The DieHard charger’s control panel houses essential functions for operation and monitoring. Depending on the model (like 71225), you’ll find indicators for charging status, battery condition, and potential faults. Manual chargers, such as the DH0168, feature amperage selection dials for customized charging rates. Automatic models display charging cycles and completion status.
Familiarize yourself with the specific controls on your DieHard charger to effectively manage the charging process and ensure optimal battery health. Refer to the diagrams for clarity.
Wheeled Design and Portability
Many DieHard battery chargers, notably the DH0168 “2-in-1” model, incorporate a wheeled design for enhanced portability. This feature significantly eases movement around garages, workshops, or roadside locations. The robust wheels and handle allow for convenient transport, even with the charger’s substantial weight.
This design element is particularly beneficial for users who frequently need to charge batteries in different vehicles or locations. The portability ensures accessibility and simplifies the charging process, maximizing convenience.
Operating Instructions: Manual Charging Mode
For DieHard chargers offering manual control, like the DH0168, begin by connecting the charger to the battery, ensuring correct polarity – red clamp to positive (+), black to negative (-). Carefully set the desired charging rate (amperage) based on the battery’s capacity; lower amperage for smaller batteries, higher for larger.
Regularly monitor the charging process, observing voltage and current readings. Disconnect the charger once the battery reaches full charge, avoiding overcharging which can damage the battery.
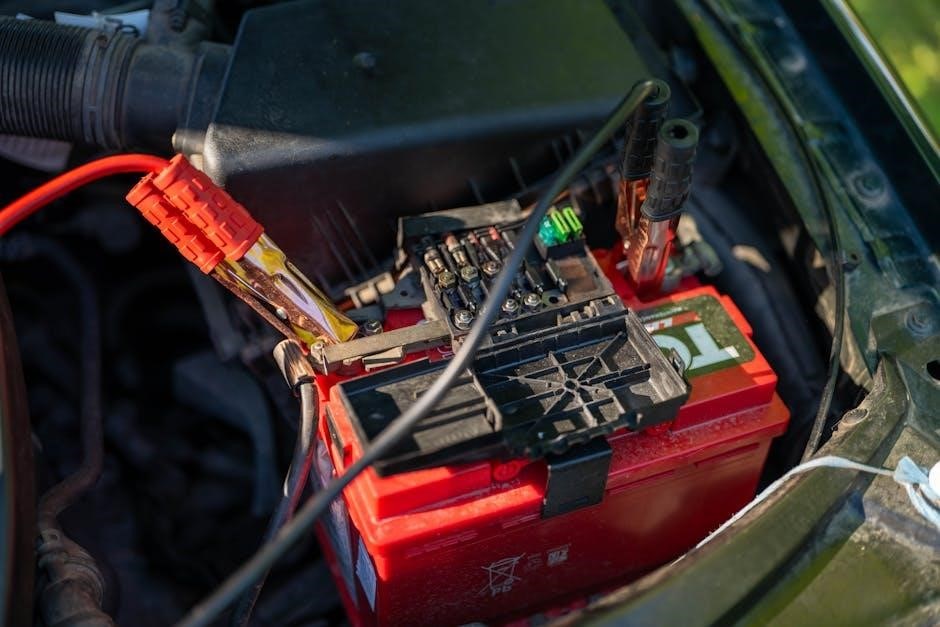
Connecting the Charger to the Battery
Before connecting your DieHard charger, ensure the vehicle is turned off and there are no flammable materials nearby. Attach the red (positive) clamp to the positive terminal of the battery, and the black (negative) clamp to the chassis or the negative terminal – never connect directly to the carburetor or fuel lines.
Double-check the connections for secure contact. A loose connection can cause sparks and inefficient charging. Ensure the clamps are firmly gripping the terminals before initiating the charging process for optimal results.
Setting the Charging Rate (Amperage)
For manual DieHard chargers, selecting the correct amperage is crucial. Begin with the lowest amperage setting and increase it gradually if needed, based on the battery’s size and state of discharge. A 6-amp setting is often suitable for smaller batteries, while larger batteries may require a higher rate.
Refer to the battery manufacturer’s recommendations for optimal charging amperage. Overcharging can damage the battery, while undercharging may not fully restore its capacity. Monitor the charging process closely.
Monitoring the Charging Process
Regularly check the battery voltage during charging using a voltmeter. As the battery charges, the voltage will increase. For a 12-volt battery, a fully charged state is typically around 12.6 to 12.8 volts. Avoid exceeding 14.8 volts, as this could indicate overcharging and potential damage.
Also, monitor the battery’s temperature; it should not become excessively hot. If overheating occurs, reduce the charging rate or disconnect the charger immediately. Consistent monitoring ensures safe and effective charging.
Operating Instructions: Automatic Charging Mode
DieHard automatic chargers, like model 71219-CA and 71225, simplify battery charging. Connect the charger to the battery, ensuring correct polarity (red to positive, black to negative). Select the automatic mode; the charger will then analyze the battery’s state and initiate the appropriate charging cycle.
The charger will automatically switch between bulk, absorption, and float stages to optimize charging. Once fully charged, it will maintain the battery at a safe voltage, preventing overcharging and extending battery life.
Automatic Mode Functionality
DieHard automatic mode, featured in models like 71219-CA and 71225, offers a convenient, hands-free charging experience. The microprocessor-controlled system intelligently manages the charging process, eliminating the need for manual adjustments. It automatically detects battery voltage and adjusts the charging current accordingly.
This mode is ideal for maintaining batteries over extended periods, as it prevents overcharging and sulfation. The charger cycles through different stages, ensuring optimal battery health and longevity, providing a truly ‘set it and forget it’ solution.
Charging Cycle Explained
DieHard automatic chargers utilize a multi-stage charging cycle for optimal battery care. Initially, a bulk charge rapidly restores a significant portion of the battery’s capacity. This transitions into an absorption phase, where the voltage is maintained while the current gradually decreases.
Following absorption, a float stage maintains the battery at full charge with a reduced voltage, preventing overcharging. Some models, like 71225, include a desulfation phase to recover moderately sulfated batteries, extending their lifespan and performance. This intelligent cycle ensures efficient and safe charging.
Engine Starter Function
Certain DieHard chargers, such as the DH0168 and 71225, incorporate an engine starter feature for jump-starting vehicles. This function delivers a high-current boost to overcome a discharged battery’s inability to crank the engine.
However, exercising caution is paramount; improper connection or prolonged boosting can damage both the charger and the vehicle’s electrical system. Always adhere to the specified boosting time (typically a few seconds) and follow the outlined safety guidelines to prevent potential hazards.
Using the Engine Starter Feature
To utilize the engine starter, connect the red clamp to the vehicle’s positive (+) terminal and the black clamp to a grounded metal surface away from the battery. Ensure the vehicle is in Park or Neutral with the parking brake engaged.
Turn the charger’s engine start switch to the ‘Start’ position for a maximum of 5-10 seconds. Avoid continuous operation, as overheating can occur. If the engine doesn’t start, wait a few minutes before attempting again, checking connections for proper contact and polarity.
Safety Considerations for Engine Starting
Prioritize safety when using the engine starter feature. Always wear eye protection to shield against potential sparks or acid spray. Ensure adequate ventilation, as charging generates explosive hydrogen gas.
Never attempt to start a frozen battery; it may rupture. Confirm correct polarity before connecting clamps to prevent sparks and potential damage. Avoid starting vehicles in enclosed spaces. Disconnect the charger immediately after a successful start, and never leave it unattended during operation. Follow all safety rules diligently.
Battery and Alternator Testing
DieHard chargers, particularly model 71225, offer integrated battery and alternator testing capabilities. To perform a battery test, ensure the battery is fully charged, then follow the charger’s instructions to assess its voltage and cranking amps. A low reading indicates a weak or failing battery.
For alternator testing, start the engine and connect the charger. Observe the voltage reading; it should be between 13.5 and 14.5 volts, indicating proper alternator function. Deviations suggest a potential alternator issue requiring professional attention.
Performing a Battery Test
Utilizing a DieHard charger like model 71225 for battery testing is straightforward. First, fully charge the battery using the appropriate charging mode. Disconnect all loads and ensure the battery hasn’t been recently used. Connect the charger’s test leads – positive to positive, negative to negative – and select the battery test function on the control panel.
The charger will display the battery’s voltage and Cold Cranking Amps (CCA). Compare the CCA reading to the battery’s rated CCA; a significant difference indicates reduced capacity. A voltage below 12.4V suggests a discharged or failing battery.
Performing an Alternator Test
DieHard chargers, particularly the microprocessor-controlled model 71225, facilitate alternator testing. Begin by starting the engine and allowing it to run. Connect the charger to the battery while the engine is running, ensuring proper polarity. Select the alternator test function on the charger’s control panel.
The charger will display the alternator’s output voltage. A healthy alternator should produce between 13.5 and 14.5 volts. Readings outside this range indicate a potential issue with the alternator, regulator, or wiring. Low voltage suggests undercharging, while high voltage indicates overcharging.
Troubleshooting Common Issues
If your DieHard charger fails to power on, verify the AC power cord connection and ensure the outlet is functioning. For a battery not charging, confirm correct polarity and a secure connection of the clamps. Check the charging rate setting; a lower amperage may require extended charging time.
Should the engine starter not work, ensure the battery has sufficient charge and the starter cable connections are clean and tight. Refer to the owner’s manual for specific troubleshooting steps related to your DieHard model (DH0168, 71219, 71225, or 200.71315).
Charger Not Powering On
If your DieHard battery charger isn’t powering on, begin by verifying the AC power cord is securely plugged into both the charger and a working electrical outlet. Test the outlet with another device to confirm it’s providing power. Inspect the power cord for any visible damage, such as cuts or fraying.
For models like DH0168, 71219-CA, 71225, or 200.71315, check the internal fuse (if applicable) and replace it if blown. Ensure the on/off switch is fully engaged. If issues persist, consult a qualified technician.
Battery Not Charging
If the DieHard charger connects but the battery isn’t charging (models DH0168, 71219-CA, 71225, 200.71315), first ensure correct polarity. Red clamp to positive (+), black to negative (-). Verify the clamps have a clean, firm connection to the battery terminals. A weak or corroded connection can prevent charging.
Confirm the charger’s amperage setting is appropriate for the battery’s size and type. For automatic models, allow sufficient time for the charging cycle to begin. If the problem continues, the battery may be severely discharged or damaged, requiring replacement.
Engine Starter Not Working
If the engine starter function fails on your DieHard charger (DH0168, 71225, 200.71315), ensure the battery has sufficient charge. A low battery voltage won’t provide enough power to crank the engine. Confirm the starter cables are securely connected to both the battery terminals and the vehicle’s starter posts, observing correct polarity.
Verify the charger’s engine start amperage setting (e.g., 200A boost on DH0168) is appropriate for your vehicle. Avoid prolonged cranking attempts to prevent damage to the starter motor. If issues persist, a faulty starter or vehicle electrical problem may be present.
Maintenance and Care
Regular maintenance extends the life of your DieHard battery charger (DH0168, 71219-CA, 71225, 200.71315). Periodically clean the charger’s exterior with a damp cloth, avoiding harsh chemicals or solvents. Inspect the charging cables and clamps for any signs of damage, such as cracks, fraying, or corrosion. Damaged cables should be replaced immediately to ensure safe operation.
Ensure proper storage in a dry, cool environment when not in use. Avoid exposing the charger to extreme temperatures or moisture. Following these simple steps will maintain optimal performance and reliability.
Cleaning the Charger
Maintaining a clean DieHard charger (DH0168, 71219-CA, 71225, 200.71315) is crucial for optimal performance and longevity. Before cleaning, always disconnect the charger from the power outlet. Use a slightly damp cloth to wipe down the exterior casing, removing any dust, dirt, or grime. Avoid using abrasive cleaners, solvents, or excessive water, as these can damage the charger’s components.
Pay particular attention to the terminals and clamps, ensuring they are free from corrosion. A clean charger operates more efficiently and safely.
Inspecting Cables and Clamps
Regularly inspect the cables and clamps of your DieHard charger (DH0168, 71219-CA, 71225, 200.71315) for any signs of damage. Look for cracks, fraying, or exposed wires in the cables. Ensure the clamps are clean, securely attached, and free from corrosion. Damaged cables or clamps can compromise the charging process and pose a safety hazard.
If any damage is detected, immediately discontinue use and replace the affected components. Proper cable and clamp maintenance ensures a safe and efficient charging experience.
Technical Specifications
DieHard chargers (models DH0168, 71219-CA, 71225, and 200.71315) offer varied voltage and amperage ratings to suit diverse battery needs. The DH0168 provides 12V at 6A charging with a 200A engine start boost. Model 71219-CA delivers 12V at 2A. The 71225 is a microprocessor-controlled charger, while 200.71315 offers 15/25/125A capabilities.
Dimensions and weight vary by model; consult the specific product documentation for precise details. These specifications ensure compatibility and optimal performance for your charging requirements.
Voltage and Amperage Ratings
DieHard battery chargers cater to various battery types with differing voltage and amperage needs. The DieHard Gold 2-in-1 (DH0168) operates at 12V, delivering 6 amps for charging and a substantial 200 amps for engine starting. The Automatic 12V 2 Amp Charger/Maintainer (71219-CA) provides a steady 2 amps at 12V.
The 71225 microprocessor-controlled charger adjusts automatically, while the 15/25/125 AMP Charger (200.71315) offers selectable amperage levels for versatile charging options.
Charger Dimensions and Weight
DieHard battery chargers are designed with portability and usability in mind, though specific dimensions and weight vary by model. The wheeled design of some models, like the DH0168, enhances maneuverability. While precise measurements aren’t universally detailed in readily available documentation, the 15/25/125 AMP (200.71315) is notably larger due to its higher amperage capacity.
Generally, these chargers are built to be robust yet manageable for home or automotive use, balancing power with convenient handling.
Warranty Information
DieHard chargers are backed by a commitment to quality, and a warranty protects against manufacturing defects. Specific warranty details, including duration and coverage, are crucial for owners. While readily available public documentation is limited, it’s essential to retain proof of purchase for warranty claims.
For comprehensive warranty information and claim procedures, contacting DieHard customer support directly is recommended. This ensures accurate details pertaining to your specific model and purchase date are provided, safeguarding your investment.
DieHard Charger Warranty Details
Detailed warranty specifics for DieHard battery chargers aren’t broadly publicized online, necessitating direct verification. Generally, warranties cover defects in materials and workmanship under normal use. The duration often varies by model, potentially ranging from one to three years from the original purchase date.
Coverage typically includes repair or replacement of the defective unit, excluding damage from misuse, accidents, or unauthorized modifications. Retaining the original receipt is vital for processing any warranty claim efficiently. Contacting Advance Auto Parts or Ace Hardware is advised.

Contacting Customer Support
For DieHard battery charger support, the primary avenues are through the retailer where the charger was purchased. Advance Auto Parts and Ace Hardware are key contacts, offering assistance with troubleshooting, warranty claims, and general inquiries. Their websites provide contact forms and phone numbers for dedicated customer service teams.
Direct manufacturer contact information for DieHard chargers is limited publicly. Visiting the retailer’s website or physically visiting a store location is recommended. Be prepared to provide the model number (e.g., DH0168, 71219) and proof of purchase.
Frequently Asked Questions (FAQ)
Q: Can I use the DieHard charger on any type of 12V battery? A: Yes, these chargers are designed for standard lead-acid, AGM, and gel batteries. Q: What does ‘automatic mode’ do? A: It cycles through charge, maintain, and float stages without user intervention. Q: My charger isn’t turning on – what should I do? A: Check the power cord and outlet, and ensure the fuse hasn’t blown.
Q: How do I interpret the battery test results? A: Refer to the manual for specific readings and their meanings. Q: Is the engine starter safe for all vehicles? A: Consult your vehicle’s manual before use.